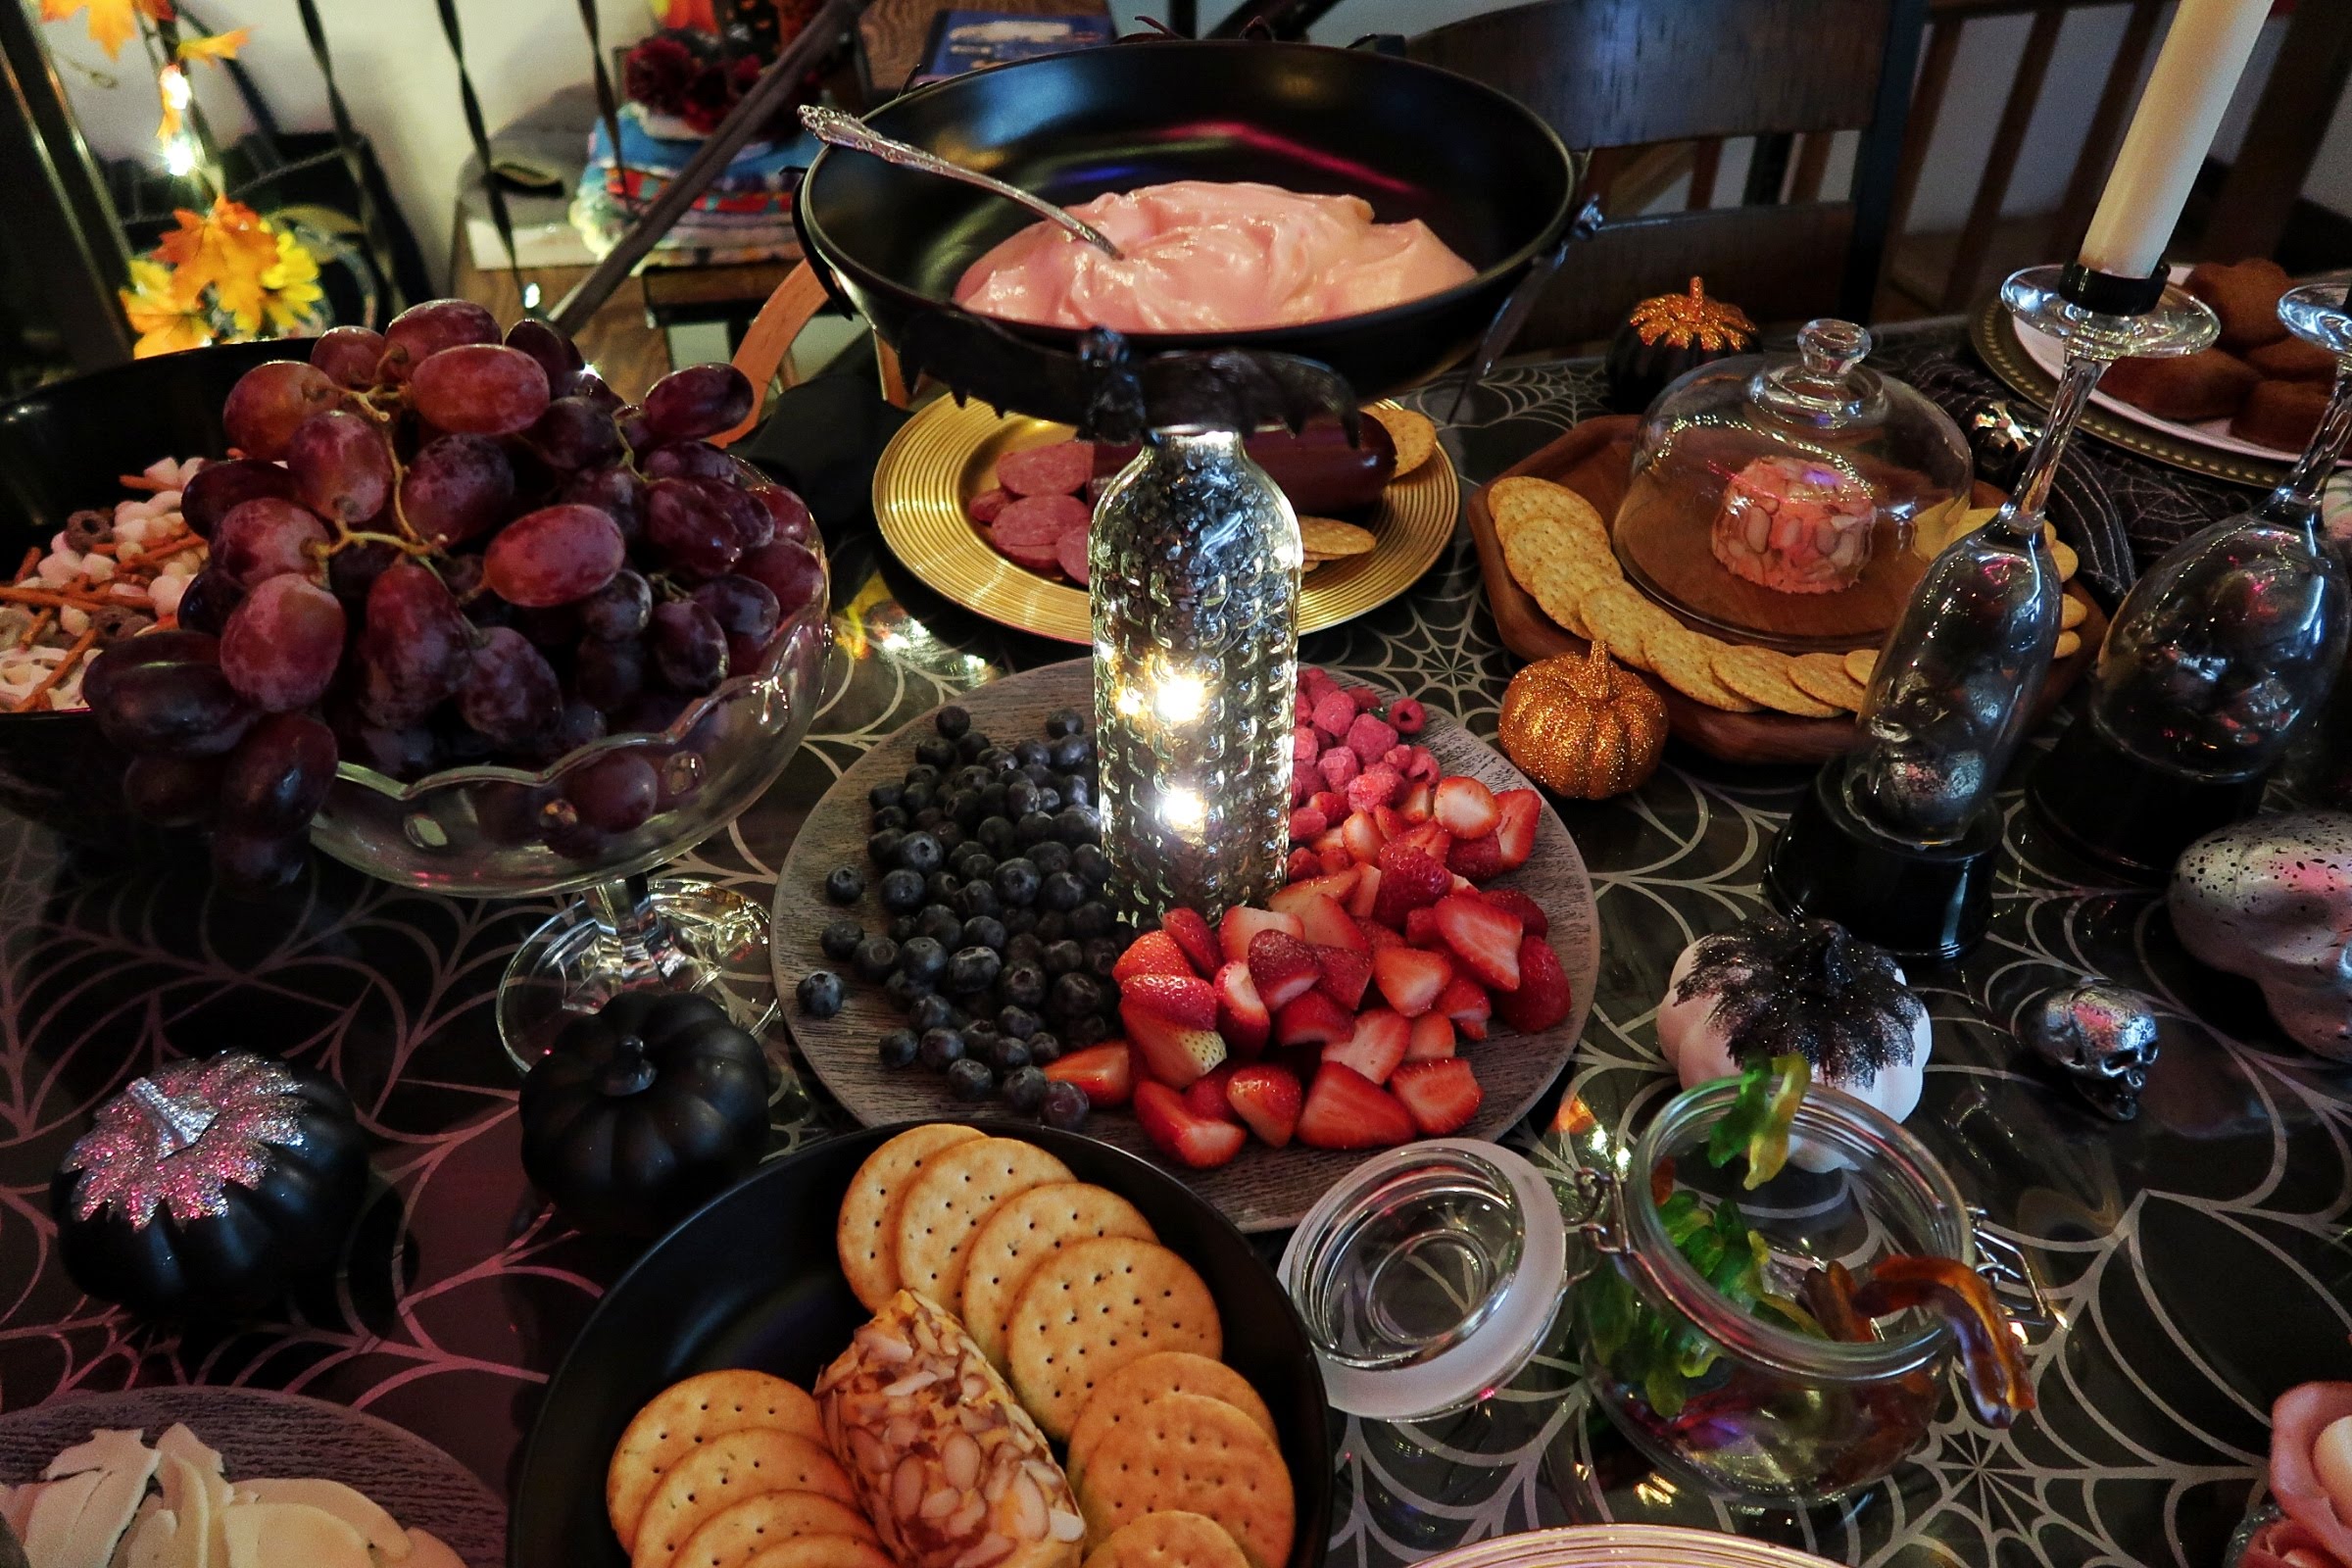
We’re Batty For This Fruit Tray!
Are you in a time crunch but still want to impress your guests with a centerpiece that screams ‘I put effort into this, but not too much effort’? Look no further! This one-of-a-kind fruit tray will impress all your witch and goblin guests. Plus, it’s made with stuff you likely have lying around in your kitchen and craft closet, so you can save your time for more important things, like perfecting your witch cackle or practicing your best ghost impression. So get out that hot glue gun and let’s get to putting together a fang-tastic Halloween party table!
Here’s what you need:
Note: Many of the items we used were from around our house or local markets. The links provided are products we found to be similar in looks, size or materials and have not been tested by us.
Materials:
- 1 – Black Plastic Bowl (Ours measured 8.5 inches in diameter from the top) – We’ve linked some similar bowls here
- 1 – Olive Oil Bottle – We’ve linked some similar bottles here
- 1 – String of battery-operated fairy lights. The rechargeable kind are our favorites – We’ve linked our favorite fairy lights here
- 1 – package of plastic bats – We’ve linked some similar bats here
- 1 – bottle of silver metallic acrylic paint – We’ve linked some similar here
- 2 – 1 lb bags of decorative glass rocks found in the home decorating section. (We used one bag of silver and one bag of gold. – We’ve linked some similar here
- 1 – large plastic or wood plate (we used a large plastic plate that looks like wood).
- 1 – package of strawberries
- 1 – package of blueberries
- 1 – package of raspberries
- 1 – bowl of fruit dip (we used strawberry cream cheese fruit dip)
- 1 – paint brush
Instructions:

- Starting with your plastic bats and silver metallic acrylic paint, paint a nice layer of silver on your bats. We chose to only paint them with one coat so that all of the little texture details would stay visible.

- We used some acrylic paint we found at the Dollar Store by Art Skills but you can use any brand available to you.

- Using a hot glue gun or glue of your choice, glue the bats around the sides of your black bowl.

- Take your olive oil bottle and remove the lid. This lid was easy to remove as it was only a cork type lid. Place your fairy lights into your bottle, trying to distribute the lights evenly throughout the bottle.

- Using a funnel, carefully poor the silver and gold rocks into your bottle, stopping occasionally to adjust your fairy lights to that they’re still visible from the outside of the bottle. You may even want to turn the fairy lights on while you’re doing this so that you can tell if they’re being covered or not.

- After the bowl has been glued to the bottle, glue the battery pack of the fairy lights to the bottom of the bowl so that it is less visible. Make sure that the switch is still easily accessible. (We made this platter before we discovered rechargeable fairy lights, which have a much smaller switch that is easier to conceal.)
- You’re now ready to set up your fruit tray! Just place the bottle bowl combination in the center of the wood or plastic tray. We did not glue ours to the tray but you can glue it if you like.
- To set up the fruit tray, dish out the fruit dip into the bowl at the top and place the washed and chopped fruit on the tray around the base of the bottle.
Bat’s A Wrap!


Once you’ve assembled your fruit tray, place it at the center of your party table and watch as your guests marvel at your creativity. This simple yet impressive centerpiece will add a delightful touch to your Halloween gathering without consuming too much of your time. One could almost say you were…winging it.
What Do You Think?
Don’t miss out on the chance to elevate your Halloween gathering with this “Basic, yet showstopping.” centerpiece. It’s time to get into the spooky spirit and create a memorable experience for everyone! And don’t forget to let us know if you tried this for your Halloween table as well! How did it work out? Did you make some improvements?
Also, if you liked what you see here, you should check out our other Halloween ideas here! Or check out some of our other Halloween posts below.


Let us know what you think